The next step is to check the SMD LEDs’ multiplexed intensity.
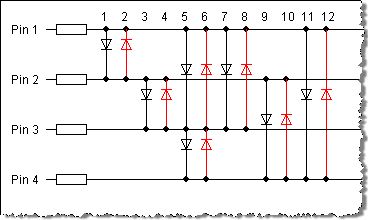
Based on our experience from our previous experiment, which is explained in more detail in this post, we wanted to apply the principle to SMD LEDs. We hoped that the LEDs would seem much brighter with this approach. We created a board with 3 pins and 12 LEDs. In addition, we wanted to find out whether it is possible to mill and hand-solder a board with very dense component placement.
Circuit design
Soldering instructions:
The code can be found in the repository.
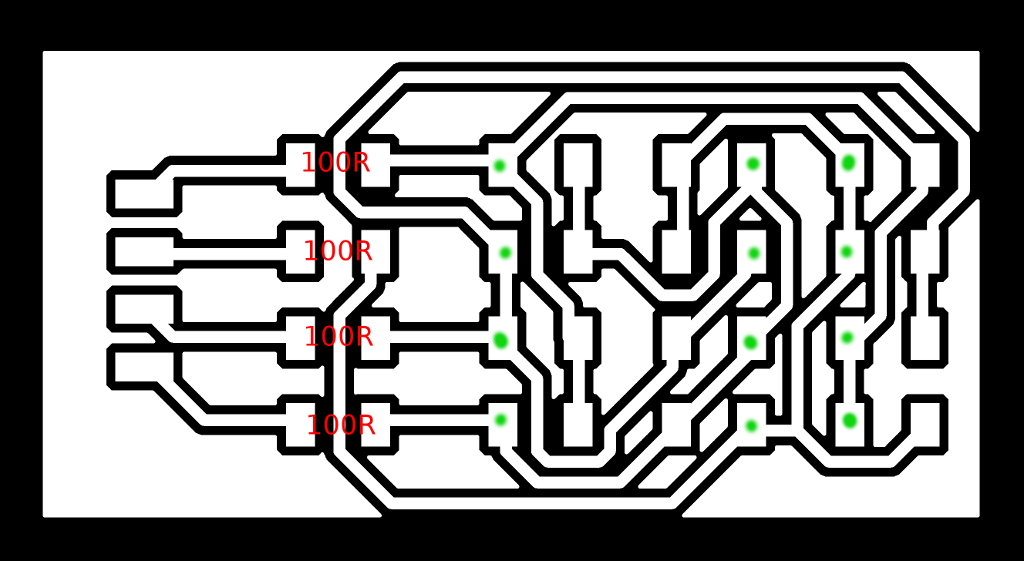
Board production and soldering
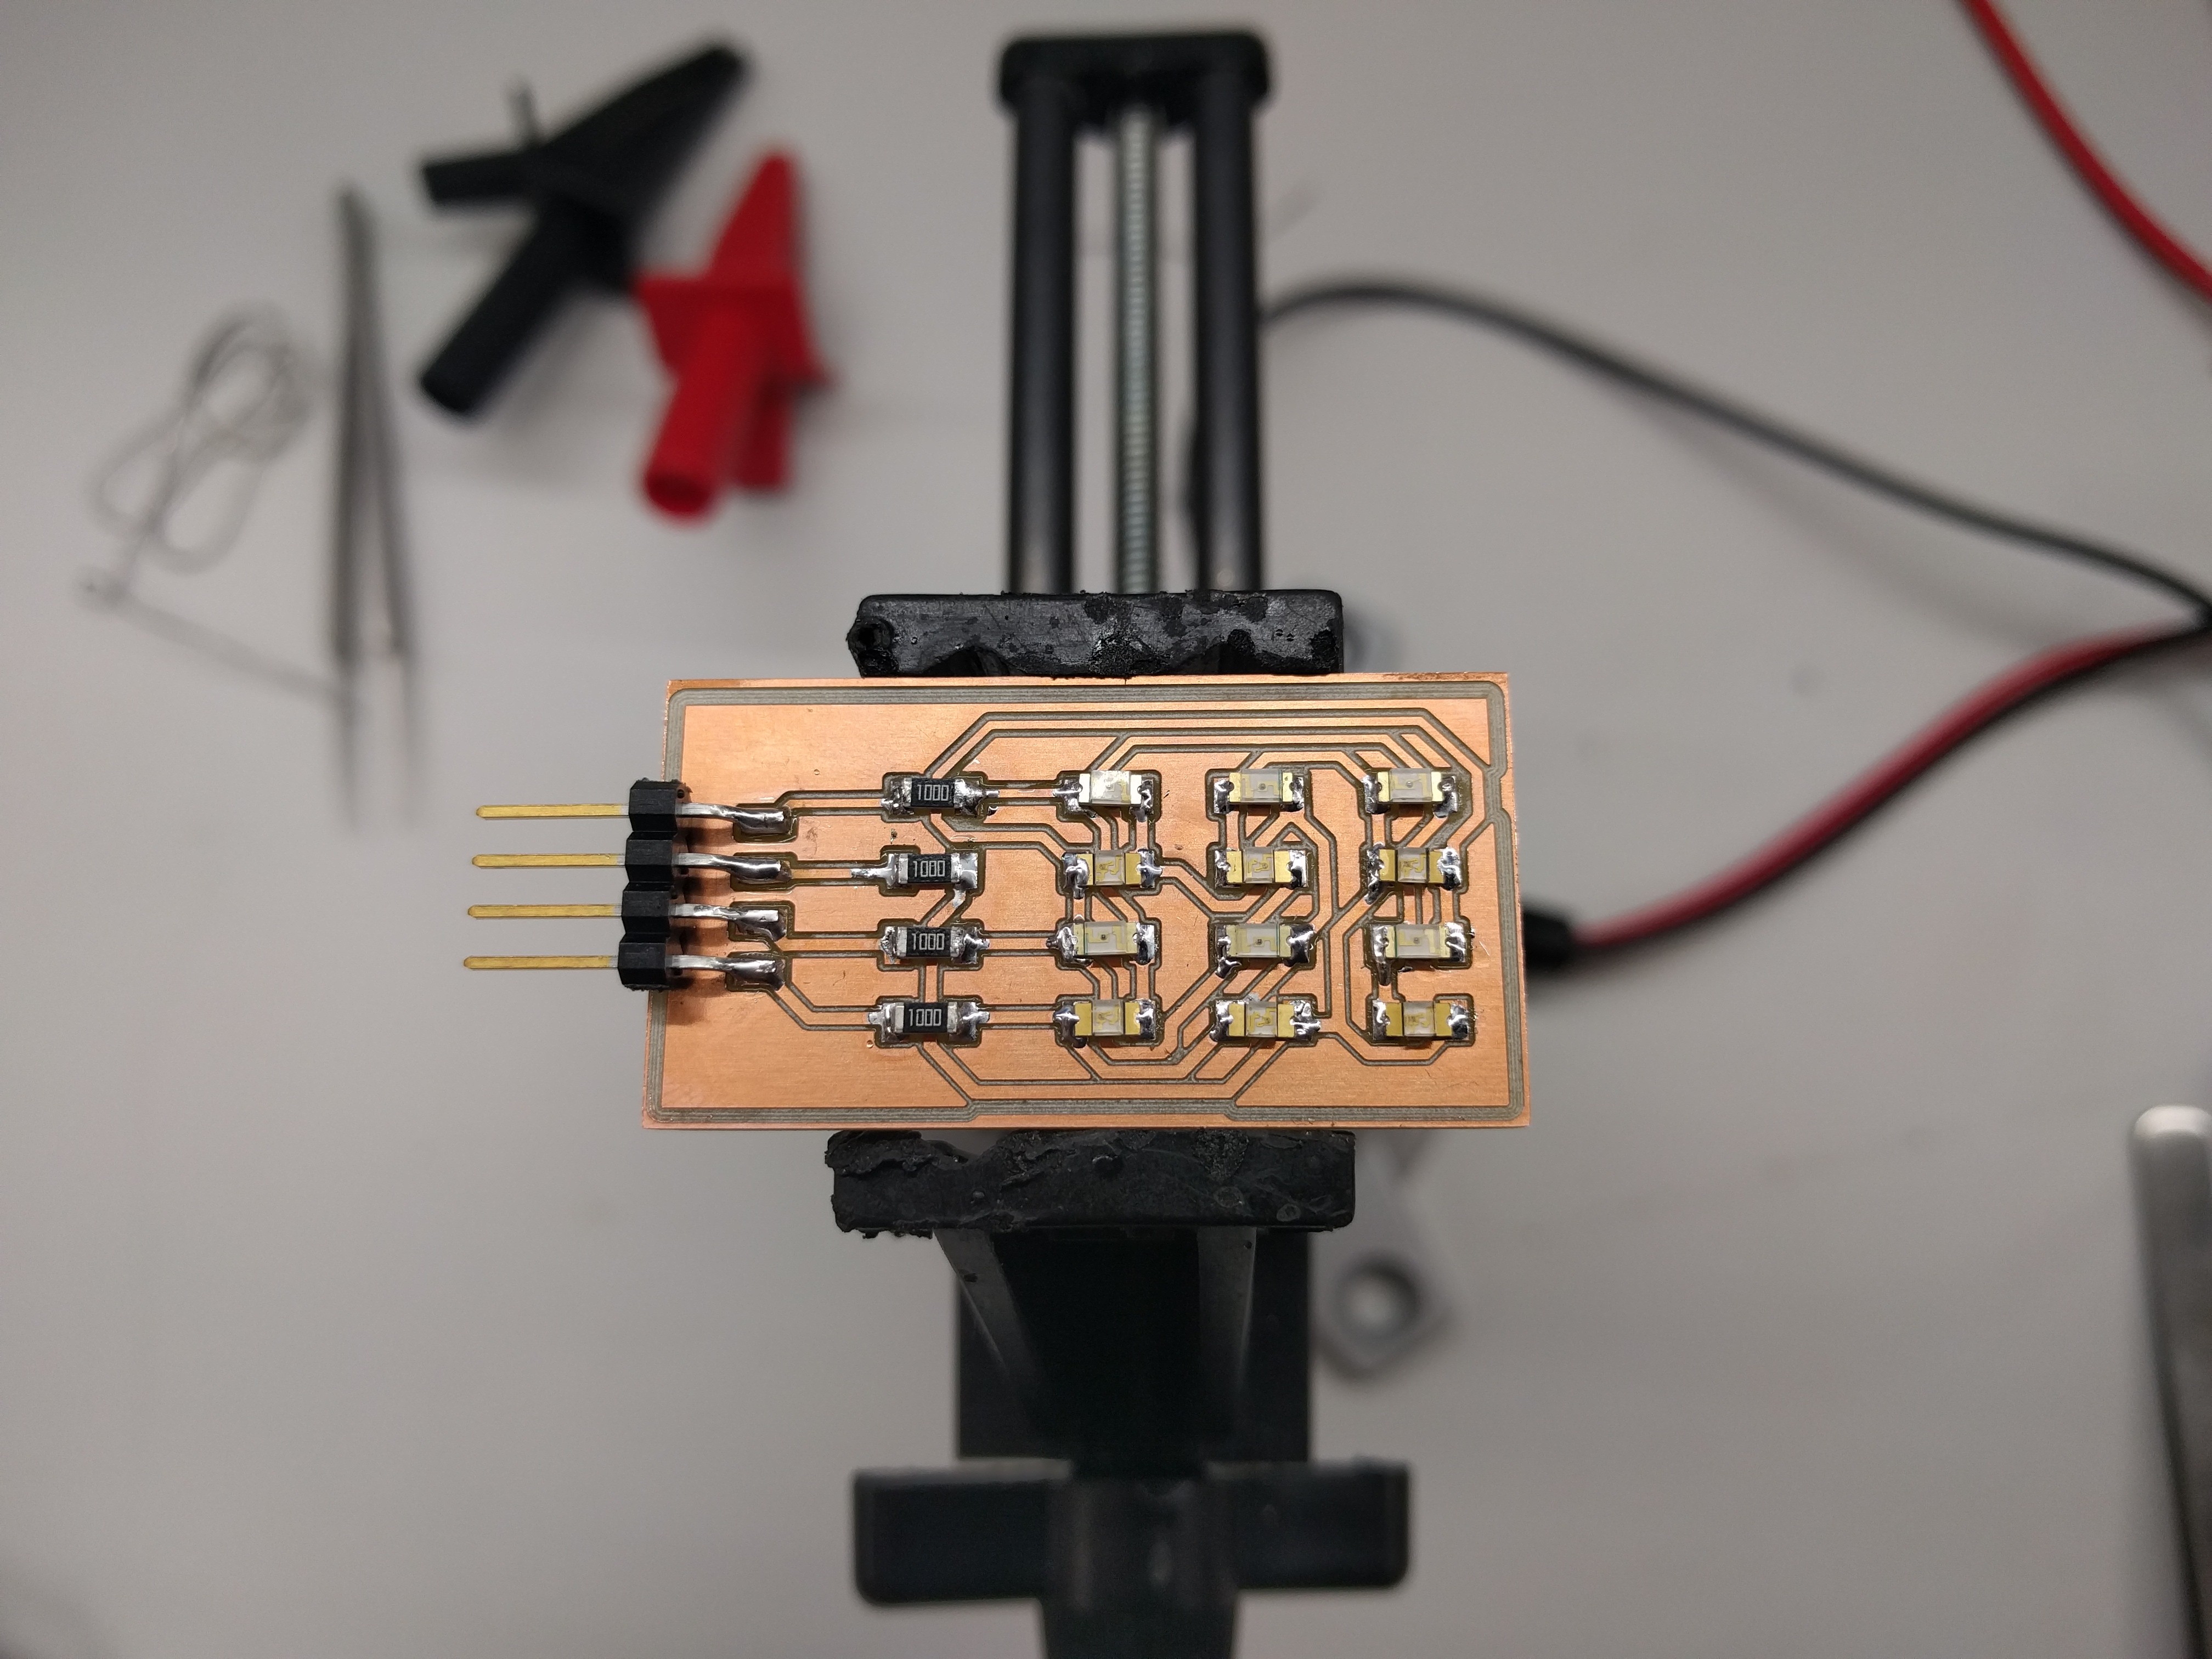
The production worked fine. We used 6 orange and 6 blue LEDs on the board assembled in a row. Except only one connection to a LED the soldering went without any problems. The connection could be easily repaired using slightly more solder.
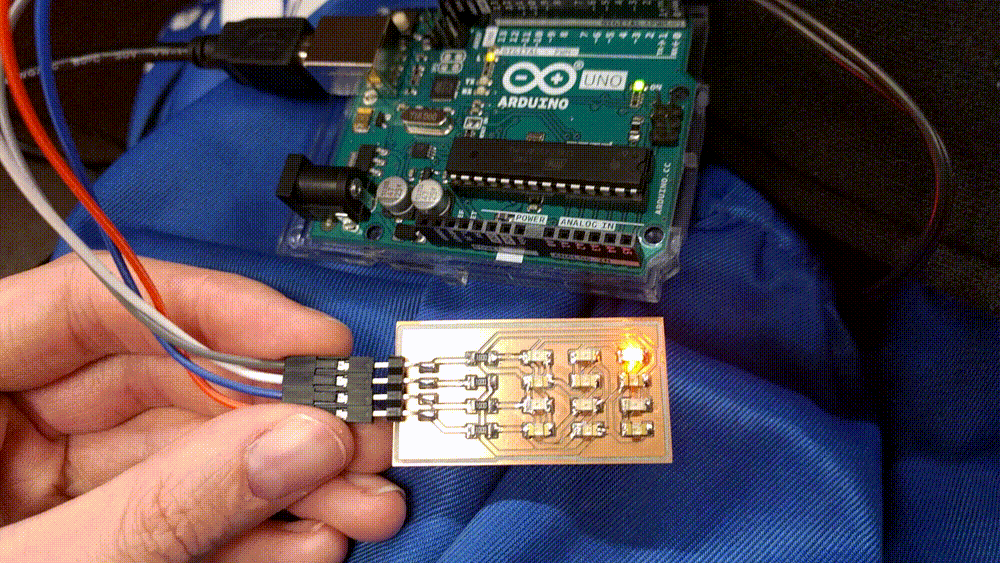
Arduino
The simple animation in the video above is based on the following program on the Arduino:
#define NUM_LEDS 12
#define DELAY 200

#define A 2
#define B 3
#define C 4
#define D 5

const int LED_MAP[NUM_LEDS][2] = {
  /*  0 */  {D, A},
  /*  1 */  {B, D},
  /*  2 */  {A, B},
  /*  3 */  {D, C},
  /*  4 */  {B, C},
  /*  5 */  {C, B},
  /*  6 */  {A, C},
  /*  7 */  {C, D},
  /*  8 */  {C, A},
  /*  9 */  {A, D},
  /* 10 */  {D, B},
  /* 11 */  {B, A}
};

void setup() {
  pinMode(A, INPUT);
  pinMode(B, INPUT);
  pinMode(C, INPUT);
  pinMode(D, INPUT);
}

void ledOn(int index) {
  pinMode(LED_MAP[index][0], OUTPUT);
  digitalWrite(LED_MAP[index][0], HIGH);
  pinMode(LED_MAP[index][1], OUTPUT);
  digitalWrite(LED_MAP[index][1], LOW);
}

void loop() {
  for(int i = 1; i < NUM_LEDS; ++i) {
    setup();
    ledOn(i);
    delay(DELAY);
  }
  for(int i = NUM_LEDS - 2; i >= 0; --i) {
    setup();
    ledOn(i);
    delay(DELAY);
  }
}
The code can be found in the repository.
Conclusion
Everything worked great. The next step is to create the final board containing (probably) 20 LEDs in a shape that will fit in the reindeer body and to write some more nice looking animations. A very nice thing is that we got more options which color we want to choose for the SMD LEDs.