As a course requirement, we needed to produce a printed circuit board at FabLab. We chose to create something what is going to be useful for our product later: a light sensor board. This board can be attached to at a yet undecided place on the final product to measure the ambient light intensity.
Circuit design
The requirements of the board along which the design must have been evaluated:
- Can read ambient light intensity.
- Standalone operation: works without microcontroller.
- Feedback LED indicates the read lighting value.
- Small size, attachable to the final product.
We chose a simple common emitter phototransistor circuit to fulfill these needs. Additional infomation about the circuit can be found here.
The design process can be followed on the following paper draft:
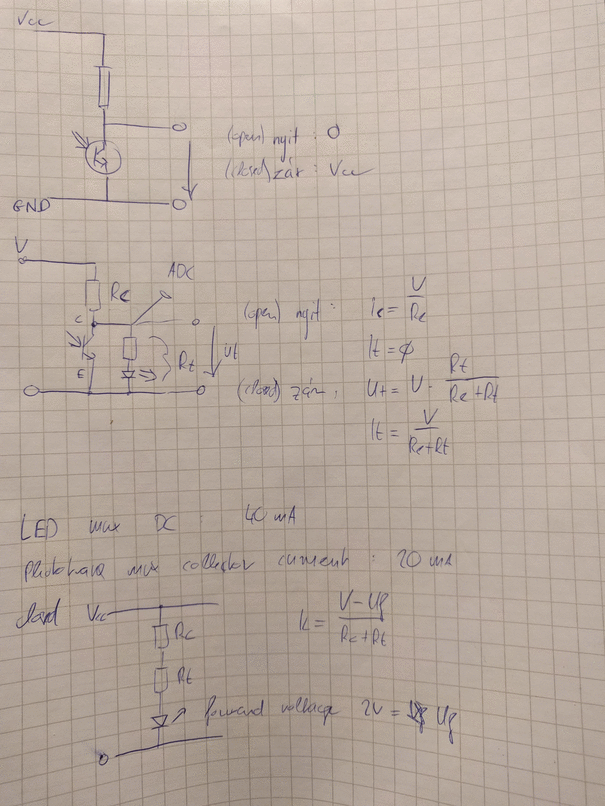
Also a simulation on Tinkercad has been run, though in some cases it gave different results than expected.
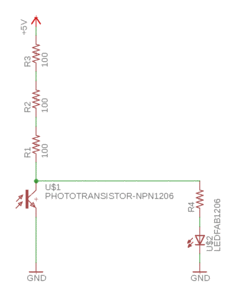
After that, and Autodesk Eagle schematic has been created:
Board production
Version 1
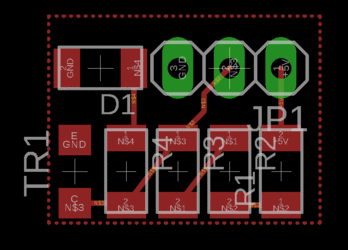
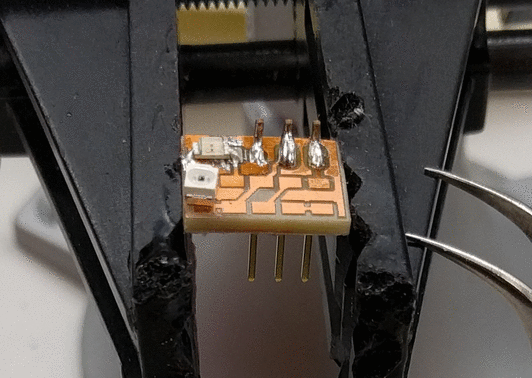
Using the Eagle schematic, an SMD board was laid out. We aimed at a very small form factor: using 1206 SMD parts available from the FabLab stock, the board size is just around 16x12 mm.
The milling of the traces, holes and outline went without issues. After that, we started the hand soldering process. Some mistakes have been made, and a number of issues and difficulties raised, listed below:
- We forgot to clean the board after milling. Obviously very difficult to solder on an unclean surface.
- The heatsink valleys on the groundfill of the traces layer were too thin thus they have not been milled out.
- The form factor of the board was too small and was difficult to solder by hand.
Version 2
Because of these problems, we chose to change the layout to a bigger one. Also, the through-hole header array has been replaced with an SMD one. During the milling of the board, we failed to recalibrate the Z position after changing the milling bits, which resulted in the breaking of the bit.
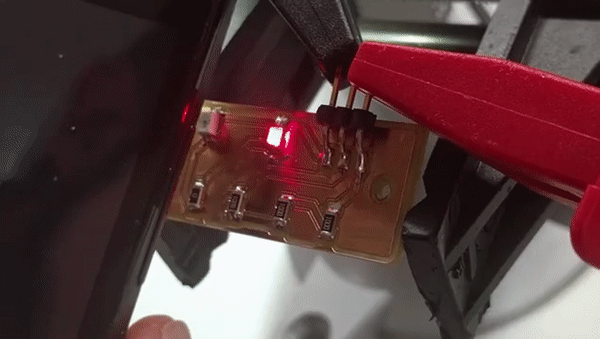
The following image was used as a soldering instruction:
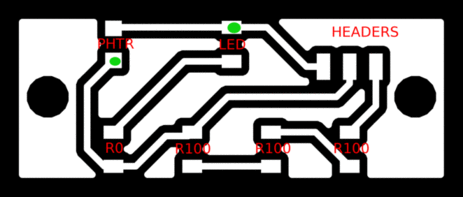
The size of the board v2 is 43x17 mm, which is quite convenient to solder on. After the soldering, we tested the circuit with a DC generator in FabLab. The sensitivity of the board is lower than expected, so the diode only opens when it is exposed to direct light.